RansomeWare Investigation
OverView
We are presented with a Disk image and a memory Dump from a computer infected with malware, this data is coming actually from a CTF I recently participated in but I found this challenge very realistic so I decided to make a detailed analysis for it, and also because I shocked with the number of people that Don’t understand about what a forensics investigator required to do in real life.
Memory Image Verification
At the very beginning of dealing with any Memory image in the volatility framework, we need to get the profile of the image with the command
vol.py -f Wanna-MEM.vmem imageinfo

Note:
    Volatility comes preloaded with windows profiles only so if you are dealing with Linux or mac profile you can simply use "strings" and grep for the word version and then load the required profile from their GitHub page yourself.
Identify the infection point
to identify the infection point I always start by looking for suspicious processes and where they came from. for doing that I will list all the processes in a parent-child format using the plugin “pstree”
vol.py -f Wanna-MEM.vmem --profile=Win10x64_19041 pstree
Immediately you can identify very suspicious behavior of a word document spawning an executable.

Now we can be sure that this is caused by a phishing word document. but where to find this document?!
We can use another plugin called “cmdline” to show which command line the word process opened with
vol.py -f Wanna-MEM.vmem --profile=Win10x64_19041 cmdline

We now know where is the word file in the device and we can get it and continue our investigation, but before that, we need to know how it arrived for us and from where it came.
Email Investigation
By looking at the processes running in the memory image we will notice an outlook process which tells us that this is the email client used in the device.

With a small search, you can find that outlook keeps its data stored in “ost” file in the location.
C:\\%USERNAME%\AppData\Local\Microsoft\Outlook
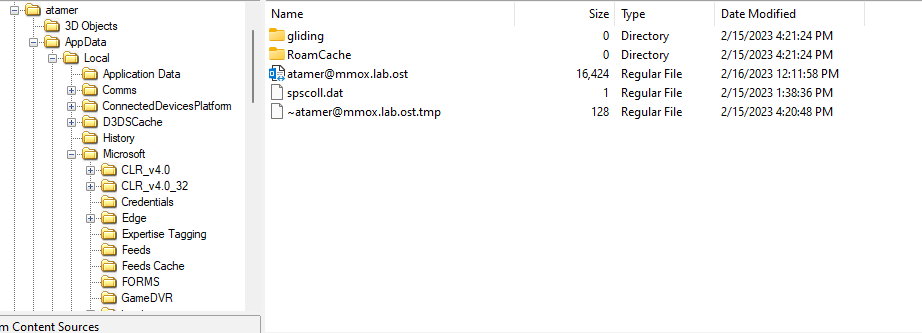
From our disk image, we can get the “ost” file using FTKImager.

We can right-click and export it to our device, then using a tool called “Kernel for ost to pst” we can convert it to pst.

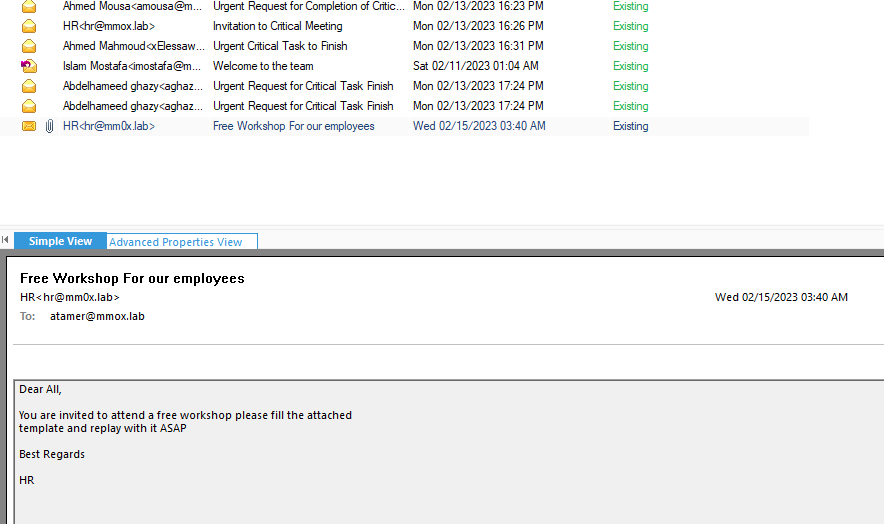
if you carefully looked at the senders’ emails you will notice a small difference between the HR emails one of them is hr@mmox.lab and the other is hr@mm0x.lab
which is a trick used in phishing to fool the user.
Attachment investigation
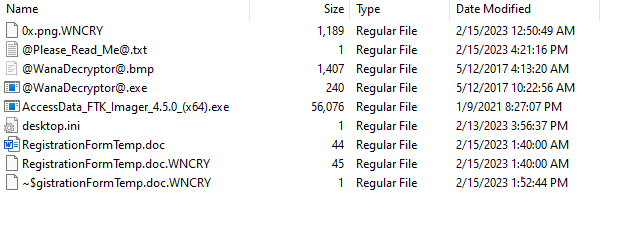
Going to the path found earlier in the memory dump for the word file which is on the desktop of tamar user we see the document there.

We can export it and continue with the analysis.
And here is the document asking us to enable content.

Let us show the macro in that attachment that will be executed once the content is enabled.

This is a simple macro that will download a file named thunder to the path “C:\Users\Public\Documents\Thunder.exe”
Droped file automated analysis
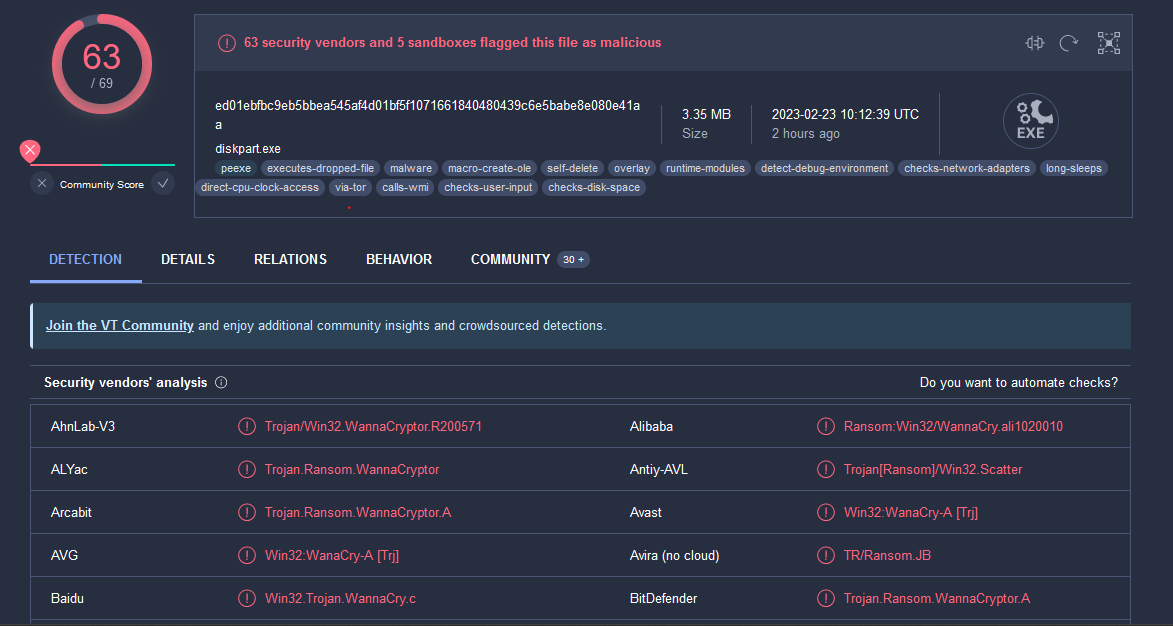
By uploading the file to virus total we can see that almost all the AV products recognized it as the famous WannaCry Ransomware

As we are focusing on forensics itself we are going to do Malware analysis here and also WannaCry has a lot of analysis reports out there.